Introduction
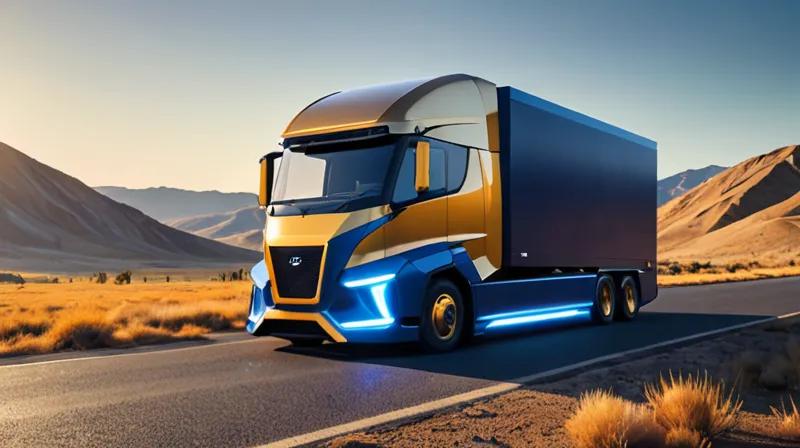
In this tutorial, you'll learn how to simulate and understand the core concepts behind autonomous truck technology using Python. While Pony.ai's new autonomous electric truck represents a significant leap in logistics automation, we'll break down the fundamental components that make autonomous vehicles work. This tutorial will teach you how to model a simple autonomous vehicle system, understand sensor data processing, and implement basic navigation logic - all using beginner-friendly Python code.
Prerequisites
- Basic understanding of Python programming
- Python 3.x installed on your computer
- Basic knowledge of object-oriented programming concepts
- Optional: Familiarity with NumPy and Matplotlib libraries
Step-by-Step Instructions
1. Setting Up Your Development Environment
1.1 Install Required Libraries
First, we need to install the necessary Python libraries for our simulation. Open your terminal or command prompt and run:
pip install numpy matplotlibWhy: NumPy provides mathematical operations needed for sensor data processing, while Matplotlib will help visualize our autonomous truck's movement and decision-making.
1.2 Create Project Structure
Create a new folder called autonomous_truck_sim and inside it, create a file named truck_simulation.py. This will be our main simulation file.
2. Creating the Basic Truck Class
2.1 Define the Truck Object
Let's start by creating a basic representation of our autonomous truck:
import numpy as np
import matplotlib.pyplot as plt


class AutonomousTruck:
    def __init__(self, x=0, y=0, speed=0):
        self.x = x  # X position
        self.y = y  # Y position
        self.speed = speed  # Current speed
        self.direction = 0  # Direction in degrees
        self.sensors = []  # List of sensors

    def update_position(self, dt):
        # Update position based on speed and direction
        self.x += self.speed * np.cos(np.radians(self.direction)) * dt
        self.y += self.speed * np.sin(np.radians(self.direction)) * dt

    def set_speed(self, speed):
        self.speed = speed

    def set_direction(self, direction):
        self.direction = direction

    def add_sensor(self, sensor_type, range_limit):
        # Add a sensor to our truck
        sensor = {
            'type': sensor_type,
            'range': range_limit,
            'data': []
        }
        self.sensors.append(sensor)

    def display_status(self):
        print(f"Truck at position ({self.x:.2f}, {self.y:.2f})")
        print(f"Speed: {self.speed} km/h, Direction: {self.direction}°")
Why: This creates a foundation for our truck object with basic properties like position, speed, and direction. The sensors list will store information about different types of sensors our truck might have.
3. Implementing Sensor Simulation
3.1 Add Sensor Data Generation
Now we'll add functionality to simulate sensor readings:
def simulate_sensor_data(self, obstacles):
    # Simulate sensor readings
    for sensor in self.sensors:
        sensor['data'] = []
        for obstacle in obstacles:
            # Calculate distance to obstacle
            distance = np.sqrt((obstacle['x'] - self.x)**2 + (obstacle['y'] - self.y)**2)

            # Check if obstacle is within sensor range
            if distance <= sensor['range']:
                sensor['data'].append({
                    'distance': distance,
                    'angle': np.degrees(np.arctan2(obstacle['y'] - self.y, obstacle['x'] - self.x)),
                    'type': obstacle['type']
                })
Why: Sensors are crucial for autonomous vehicles to perceive their environment. This function simulates how sensors detect obstacles within their range, which is essential for navigation and collision avoidance.
3.2 Create Obstacle Management
Let's add a method to manage obstacles in our environment:
def create_obstacles(self, num_obstacles=5):
    # Create random obstacles in our environment
    obstacles = []
    for i in range(num_obstacles):
        obstacle = {
            'x': np.random.uniform(0, 100),
            'y': np.random.uniform(0, 100),
            'type': np.random.choice(['car', 'truck', 'pedestrian', 'construction'])
        }
        obstacles.append(obstacle)
    return obstacles
4. Implementing Navigation Logic
4.1 Basic Path Planning
Let's add a simple path planning algorithm to our truck:
def plan_path(self, target_x, target_y, obstacles):
    # Simple obstacle avoidance algorithm

    # Calculate direct path to target
    target_angle = np.degrees(np.arctan2(target_y - self.y, target_x - self.x))

    # Check if any obstacles are in the way
    safe_direction = target_angle

    for sensor in self.sensors:
        for data in sensor['data']:
            # If obstacle is close, adjust direction
            if data['distance'] < 10:  # If obstacle is within 10 meters
                # Adjust direction to avoid obstacle
                if data['angle'] > target_angle:
                    safe_direction = target_angle - 30  # Turn left
                else:
                    safe_direction = target_angle + 30  # Turn right

    self.set_direction(safe_direction)

    # If no obstacles, go directly to target
    if not any(sensor['data'] for sensor in self.sensors):
        self.set_direction(target_angle)
Why: This simulates how autonomous vehicles make decisions based on sensor data. The truck evaluates obstacles and adjusts its direction to avoid collisions while still heading toward its destination.
4.2 Complete Simulation Loop
Now let's create the main simulation loop:
def run_simulation(self, target_x, target_y, num_steps=100):
    # Create obstacles
    obstacles = self.create_obstacles()

    # Initialize plot
    plt.figure(figsize=(10, 10))

    for step in range(num_steps):
        # Simulate sensor data
        self.simulate_sensor_data(obstacles)

        # Plan new path
        self.plan_path(target_x, target_y, obstacles)

        # Update position
        self.update_position(1)  # 1 second step

        # Plot current state
        plt.clf()  # Clear previous plot

        # Plot obstacles
        for obstacle in obstacles:
            plt.scatter(obstacle['x'], obstacle['y'], c='red', s=100, alpha=0.7)

        # Plot truck
        plt.scatter(self.x, self.y, c='blue', s=200, marker='s')

        # Plot target
        plt.scatter(target_x, target_y, c='green', s=200, marker='^')

        # Plot direction indicator
        plt.arrow(self.x, self.y, 5*np.cos(np.radians(self.direction)),
                 5*np.sin(np.radians(self.direction)),
                 head_width=0.5, head_length=0.5, fc='blue', ec='blue')

        plt.xlim(0, 100)
        plt.ylim(0, 100)
        plt.title(f'Autonomous Truck Simulation - Step {step}')
        plt.xlabel('X Position')
        plt.ylabel('Y Position')
        plt.grid(True)

        plt.pause(0.1)  # Pause to show animation

        # Check if truck reached target
        distance_to_target = np.sqrt((target_x - self.x)**2 + (target_y - self.y)**2)
        if distance_to_target < 2:
            print(f"Truck reached target at step {step}")
            break
5. Running the Simulation
5.1 Complete the Main Program
Finally, let's add the main execution code to our file:
# Main execution
if __name__ == "__main__":
    # Create truck
    truck = AutonomousTruck(x=10, y=10)

    # Add sensors
    truck.add_sensor('lidar', 50)
    truck.add_sensor('radar', 30)
    truck.add_sensor('camera', 20)

    # Set target destination
    target_x, target_y = 80, 80

    # Run simulation
    truck.run_simulation(target_x, target_y)

    print("Simulation completed!")
Why: This final step ties everything together. It creates a truck, sets up its sensors, defines a destination, and runs the simulation to see how our truck navigates toward its goal while avoiding obstacles.
Summary
In this tutorial, you've learned how to create a basic simulation of an autonomous truck system. You've built a truck object with position, speed, and direction properties, added sensor simulation capabilities, and implemented simple navigation logic. While this is a simplified model compared to real autonomous vehicles like Pony.ai's electric truck, it demonstrates the fundamental concepts of how autonomous systems process sensor data to make navigation decisions. The skills you've learned here form the foundation for understanding more complex autonomous vehicle systems, including those used in logistics fleets for freight supply chains.
Key takeaways include understanding how sensors provide environmental data, how that data is processed to make decisions, and how autonomous systems navigate while avoiding obstacles. This knowledge directly relates to the technology Pony.ai is developing for their autonomous electric trucks.